Sunday, December 9, 2012

Wild Goose Chase

A wonderful two color vintage Wild Goose Chase Quilt.


The maker of this quilt, Elizabeth, inscribed her name on the back in ink.  Elizabeth was a resident of Skaneateles, New York in the mid 19th century.  A family descendent did not know what the "No. 19" meant below Elizabeth's signature.  I thought possibly it could be the 19th quilt in her dowry?   Or the No. 19 in the laundry rotation?

The quilting design had me wondering whether it was quilted at a later date.  Can you see the hearts in the muslin sashing? A heart motif is not one I've seen frequently on vintage quilts.  The quality of the quilting stitch was definitely from a skilled quilter using fine stitches.  Maybe the hearts do lend towards the theory of the quilt being part of a dowry.
I was fortunate enough to have this quilt this past summer to clean for a family descendant of Elizabeth.  The quilt was found in a storage area and had some red staining, possibly from a blanket or another quilt with unstable red dye. 

A contemporary reproduction of the yellow print in the antique quilt would be this print from ReproductionFabrics.com.

Is this colorway making a comeback?  The February 2013 issue of American Patchwork & Quilting has a two color quilt in a Churn Dash variation.  While Butter Churn has a contemporary feel, the antique quilt is from the early 20th century.  Since this colorway has been sporadic in popularity over time, it is nice to see some attention devoted to this happy colorway.

Personally, I'm a fan of chrome orange.  But then again, you're talking to someone with an orange front door, a living room painted in Pumpkin Spice (like living inside a pumpkin) and whose alma mater is the Orange.  

Saturday, December 1, 2012

Quilting Designs

I am often asked how I come up with quilting designs.  I remember when I first started quilting it was something I found the most difficult; just letting go and doing whatever I wanted rather than using conventional all-over designs.

Eventually, I learned to treat my needle as a pencil, my fabric as a piece of paper and imagine I was doodling.  This process set me free (so to speak).

When I am really perplexed, I use the following technique:

I take a piece of vinyl (from the bags used for packaging bedding), and place it over my block.  Then, I take a dry erase pen and practice with doodling a design.  If I don't like the pattern, I take a soft cloth, wipe the vinyl clean and start over.  When I get a design I like, I keep practicing the pattern.  I tried to emulate the iconic Mary Engelbreit flower in this doodle.

Once I have the design down, I go to my sewing machine and quilt the pattern.

A cotton batting will give your quilt an "antiqued" look once it is washed after it is quilted.  PREWASH any red fabrics.  Believe me, many dependable fabric makers still have red dyes that bleed!  I've learned the hard way; you don't need to learn this lesson.  The quilt in this photo was designed by Mary Engelbreit for her Moda fabric, Basket of Flowers.  The quilt pattern was free from the Moda website.

Hope this method let's your imagination take off.

Friday, November 30, 2012

Heavy machine quilting

If I said I used over 25 bobbins of thread while machine quilting a quilt, would you be able to picture how heavy the machine quilting was on the quilt surface?

This obsession with heavy machine quilting started back in 1989 when I was a member of a local quilting guild.  I was a member of a friendship group within the guild. Each member of the friendship group picked a quilt pattern and then everyone would make each other their blocks .

I did not make many friends in this friendship group because: 1) I selected an applique design, 2) the members didn't want to applique  and the final nail in the coffin - 3) I was going to machine quilt my blocks.  Machine quilting was considered taboo in the '80's!    When I received my blocks to make my quilt, they were not all uniform because the members had varying skill with the needle.

To make sure the blocks would survive my household and not come apart, I decided to meander the entire top (including the applique) in a clear nylon thread*.  Viola, 23 years later, my Oak Leaf Cluster quilt is still in use.

Some of the fabrics have faded more aggressively than others.  I don't believe 1980's fabrics will be remembered for their consistency in quality!

Some feathers quilted in the open areas.
Over the years, I get in the mood to quilt something as if there is going to be a thread shortage.

This is a wallhanging I sold on Etsy.  Lots of quilting on this little gem.

A quilt I sold on Etsy in which the background is quilted in a colorful variegated thread in a circular design.  


 So if you're wondering why I'm talking about heavy machine quilting, it is because I recently purchased a vintage quilt top on Etsy from Spring Street Emporium.  I saw it, I loved it, I clicked my payment method and I'm quilting it.  Simple.

It is vintage.  It has some stains.  There are some puckers - okay, there are a few puckers, but oh, it is sweet and the fabrics are fun!  As soon as I got it, I had it down on the floor pinning it to the backing and batting.  I even went out and had to purchase 300 more pins!


I think these stains are minor and will wash out!

Aren't the fabrics sweet!


Last night I put it to the machine and the quilting pattern picked itself.  I think when I was pinning and admiring the circle and polka dot  prints my mind said to quilt circles! 


My circles aren't perfect, but when I wash the quilt and the batting puffs, no one will notice!

I have quilted 5 of the 25 blocks as of this minute and have used 4 bobbins of thread.  I'm thinking by the time I'm finished I might have around 25 bobbins tallied. 

A peek at the back.  I used  Moda American Jane and a strip of Kaffe Fassett shot cotton.  :) 


*About the nylon thread - I have never had a problem quilting with nylon thread.  I have never had it cause damage to my sewing machine (Bernina 930 and 1230).  Over the years with all the use and washing, the thread has never broken, split or caused damage to any of the cotton fabrics.  While I quilt all my quilts now with 100 percent cotton thread, I found it was a staple for my early quilting projects in the 1980's and early 90's. 

Wednesday, November 28, 2012

It's a dog...

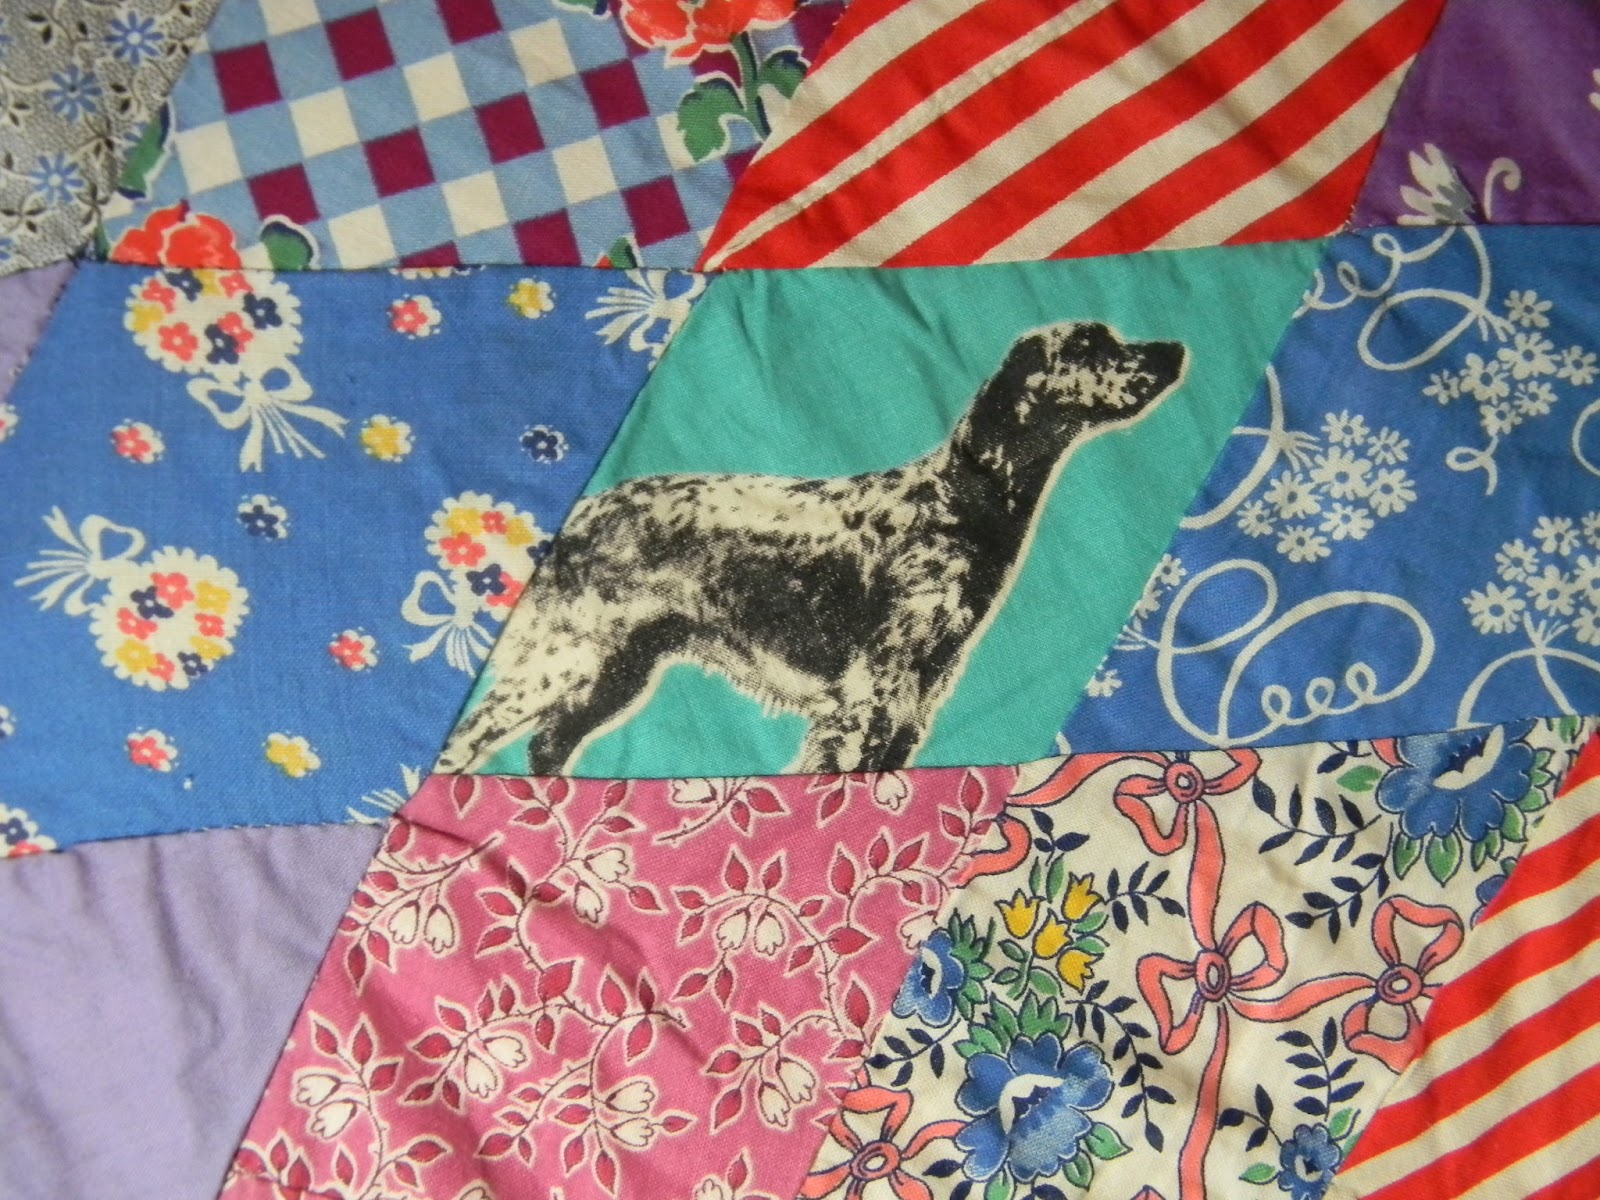
The placement of the diamonds in a never ending pattern radiating out is similar to #4006 from the Encyclopedia of Pieced Patterns by Barbara Brackman.  It is called a Sunburst.


I purchased this top at an auction this past fall.  Since my interest has been 19th century rather than 20th century fabrics, I was surprised this top made its way home with me.  It is reminiscent of a style of quilts  Kaffe Fassett would be creating for his next fabric line.

This quilt is definitely a bold mix of late 30's, 40's and 50's fabrics from the scrapbag! 

Oh wait....   "It's a dog!"


Initially I wasn't overwhelmed with excitement about my purchase, however,  the dogs made it a hit.

My friend, Suzanne, talks repeatedly about the ability to market anything with a baby or a dog.  She often suggests that I retake photos of quilts and put our puppy in the picture.

"Consumers will stop and look at that picture over a plain quilt picture," she will tell me when I distress about the difficulty in capturing the essence of a quilt in photography.  A photographer I am not.  Maybe the dog will immediately confuse the observer to obsess about the cute pup rather than the quilt. 

The quilter who made this top didn't want to waste an inch of this precious dog print.  Even a paw peeking through the top of the diamond was enough to envision the rest of the dog hiding behind the other diamonds.


Here are some more fabrics I thought were interesting.  Fabrics prints to emulate  embroidered eyelet and lace netting:


I think getting a picture of our pup behaving would be more difficult than just capturing a good picture of a quilt.  Our puppy had a bad day yesterday.  It started out with my commenting about his sister graduating from obedience school.  Her picture was on Facebook with a graduation cap on.

Hold on.   YES, I'm talking about a dog. 

I told my family the only thing I could do would be to put a dunce cap on Indiana, snap a picture, plaster it in Facebook and let the world know where the wild genes in the DNA ended.  Mind you, our dog has his family lineage mapped out for generations whereas we can't even map out our family tree before the 20th century.  My son pointed this fact out to me when we were handed his pedigree.  He looked a bit sad.

My demeanor regarding Indiana Jones is tainted from living through his wild adventures yesterday.  Certainly he is taking his name seriously.  My son named him, so he should take responsibility for the outcome.  I hope he has better luck when naming his children (one day :) ).

Oh well, it is a new day.  I think Suzanne was right....  a dog in a picture can sell anything!

Happy Holidays from the household of Indiana Jones!


Monday, November 12, 2012

Loose threads.

Today I'm thinking about procrastination, patriotism, and pretty pictures. 

Procrastination:
I have been sitting on a friend's quilt for two months because I couldn't visualize a quilting design.  Two months!   The top is red/white/black and the backing fabric is bronze and cranberry Asian influenced patterned fabric.  Once I realized it was going to work out having silver on the top and a light bronze thread for the backing, the quilting started and took on a life of its own.  It felt good to chalk this project off the to-do list that had been hanging on my refrigerator for too long.

The center of the quilt has nine different sampler blocks which are set on point.  The large areas of black are what had me perplexed.  Take away the colorway and the the basic design reminded me of an Amish quilt, so the fiddle-head fern was a perfect filler in the large triangle areas.
When these areas were finished, I found that I needed to go back in with a walking foot and stitch the white sashings.  The little strips that I thought would just pop.....seemed to just pucker with out the straight line stitching.

Procrastination is a frustrating situation but maybe its not procrastination as much as time to think through a design; spending time on design development sounds far more professional than just saying you're stumped! 

Patriotism:
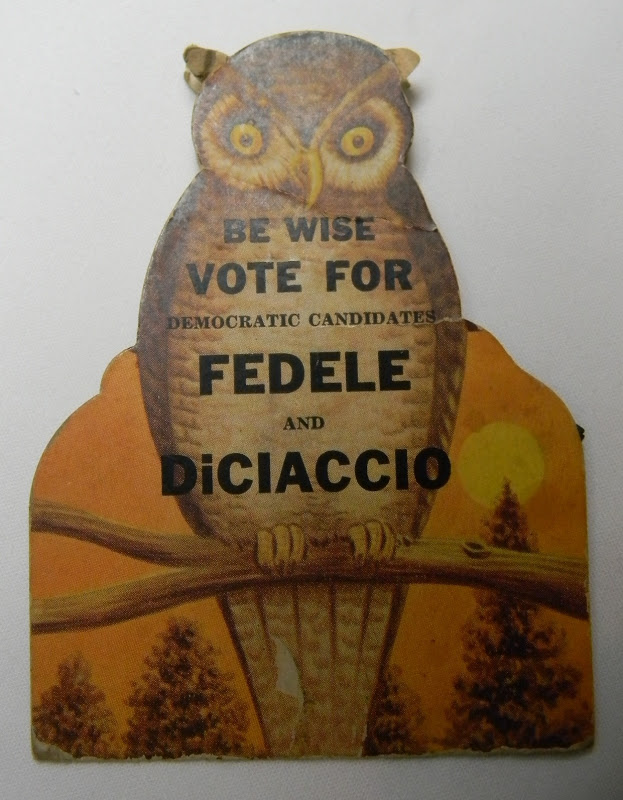
The colors of my flag are red, white and blue.  Donkeys and elephants, as well as a myriad of  smaller parties trying to gain momentum, are all represented by these colors.  It saddens me of the billions of dollars wasted through the media on political verbal warfare.   Let's go back a few decades (which so many candidates wanted to do with women's bodies) and advertise the proper way:

...and if you find a simple needle-case isn't effective, it's okay, just come up to my door with a box of thread, few yards of cotton or heck just go all the way and authorize a special model sewing machine as a token of appreciation.  If you want to buy my vote I should at least let you know some ways I could be swayed rather than be annoyed.


Pretty pictures:
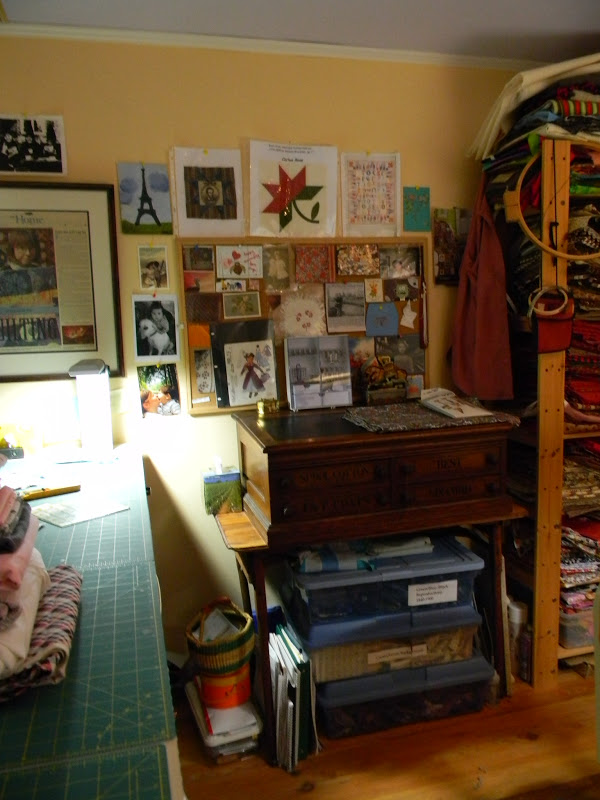
My place of refuge is my sewing room.  It is painted the colors of the sky at dawn and dusk.
My room is painted violet (ceiling), egg-yolk yellow (walls), and the trim is a pink bisque.  Although it is located in the basement with a low ceiling, colors of the sky give the room depth and warmth.

Since it is very small, I try to utilize any space I can.  A desk that runs along one wall has containers underneath for storing notions and fabric strips.
There is a very special quilt hanging where I can see it everyday.  I can't help but smile with every ounce of my being when I glance at it.  Martha sent me this in the mail as a surprise!  Martha writes a wonderful needle work blog and her posts are addictive in a very healthy way.  One day I am going to take a road trip and knock on her door.  Since we've never met, I will be standing on her porch holding this quilt as my introduction.  Yes, a road trip is on the bucket list!  Thank you Martha!

I told you every speck of space is being used.  Opps, looks like I could straighten it out a bit :)

I'll get the bottom drawer closed when the projects filling it are finished.  Here are some of my sewing books I keep grabbing for reference as well as a collection of pin cushions.
 My sewing machine sits on a table in the middle of the room.  I can look around my room at reminders of friendship, weddings, children, pets and find there are no loose ends for me when I'm doing what brings me such happiness!


Sunday, November 4, 2012

Depictions of teens in 20th century patterns.


I recently purchased a large number of vintage patterns from an estate sale.  The woman, who had lived to be 102,  had been an avid seamstress her entire life.  The patterns I purchased spanned four decades ranging from the 1930's mail order to the 1960's.  The patterns I am showing are from the 1950's.

While going through the patterns to check them to make sure all the pieces were accounted for as well as the directions, I started to notice an unsettling trend in the depiction of young teens.  They didn't look like teens at all - more all a mature women in their 20's. 

Let me give you a few more size 11 measurements:  waist 24 1/2", hip 32", width across back - 4" below neckline 12 3/4".  

Advertisers and merchandisers have long been giving unrealistic depictions of girls and women in their products!  Why in 1950 would advertisers/pattern companies want young girls to look like women?  I could reverse this question for today and ask why media and advertisers want mature women to look like young girls!  In 1950, did girls want to look like their Mother? 


Wednesday, October 31, 2012

How to make a mitered hem - tutorial

*The tutorial for the mitered hem can be used with napkins, tablecloths, or on any project where you want your hem to look great on the corner.*


Today I made the crib skirt for the pink and grey nursery set and I thought I would pass on a few steps often not included in commercial patterns.  The first is to miter your hem corners on the skirt sides rather than just turning in the side and bottom hem allowances and hemming. 

A mitered hem makes the edges crisp and gives a professional look.  The secret is the bulk is trimmed away allowing the corner to be smooth and hang straight.

In these directions I am using a total of a 1 1/2" hem on the sides and bottom of each skirt side.  Press under 1/2" and then an additional 1" hem on each side you are hemming.  At each corner, open  the hem allowances.  Fold the right sides of the fabric together to form the following triangle:

You will be sewing a 90 degree angle from the point were you turned under your 1" hem to the 1/2" hem point.  Sew a seam between these two points.
Once you've sewn your seam, trim the seam allowance to 1/4" and cut the point at an angle.
Finger press the seam allowance open.
Turn right side out with the 1/2" seam allowance on the edge turned under.  I'm using a metal Dritz hem gauge with my steam iron  to get a crisp edge when pressing.
To sew down the hem, I used my blindstitch foot with my needle to the left.
This is the inside of the mitered corner.  Sure is nice not to have bulky crooked corners!  The blindstitch foot does a great job.
Once the side panels are attacked to the main piece, I serge or finish off the seam.  Then I press the seam towards the body of the skirt base.

The next trick is I get out my blindstitch foot again and use it to put a row of stay stitching along the seam.  Stay stitching is just important in home dec sewing as it is in sewing apparel.  Just like you don't want your facing to flip up at your neckline, you don't want the seam flipping around when the skirt is washed.
Just a few extra seams will give professional results to your project.