Thursday, March 22, 2012

Another Day Like No Other Spring Day

It is as though we've never seen a daffodil bloom as we look at the gardens in amazement.

We've never had a spring this early or so brilliant as this day.

Blossoms we are lucky to see for May Day are warming in the sun.

Even some garlic that I threw into a deck planter has emerged.  Yes!

The bleeding heart won't be left behind.  I never removed any mulch; no time to do it!
So it is a spring day like no other!  I would remember whether or not a particular anniversary was as beautiful as this and I can say with authority.....no.  We may have had a sunny sky, but always chilly or just plain snowy.  To celebrate this year I made a cake to feel like spring; the  King Arthur Flour Tender White Cake.  I filled it with liquid sunshine, or what is known as a one 10 oz. jar of Dickinson's Lemon Curd.  Then I frosted it with fresh whipped cream.  Happy Anniversary to the love bugs!  :)

Tuesday, March 20, 2012

Yes, Pierogies Are Very Easy to Make

There is a reason almost every ethnic group has a filled pocket dough recipe; it is inexpensive to make.  Growing up, who didn't have some flour, eggs, potatoes, onions and cheese in the pantry?  These staples were around even when the shelves seemed a little bare at the end of the month.

I have been going through my Mother-in-law's recipe box and word processing her favorite recipes for my children.  My MIL had four different pierogi recipes!  I used the clean card, brown card method for determining her recipe's value.  Clean card meant she never used the recipe.  Brown card meant it was held, used, filed, used, etc. with additions of a little flour or oil on some occasions.  My MIL had several recipes from her Mom and other relatives and parishioners at St. Peter and Paul Ukrainian Church.  But while I wrote these out for my kids, I'm going to pass along the recipe my family used when I was growing up.

My mother never got the family recipe from my Ukrainian grandmother.   Instead, she got the recipe from a Polish neighbor, Mrs. Horschak.  It is easy, never fails, and much tastier than any frozen pierogies from the store.  So here is what I believe to be the best recipe for potato and cheese pierogies:

Start by making the filling.
Peel and cook 4 medium potatoes.  Drain water and put potatoes through a ricer.  (Using a ricer rather than mashing your potatoes makes a more uniform filling.)  Stir together with  4 - 6 ounces of grated cheese.  Use any kind of cheese you have a preference for or left in the refrigerator.  The last time I grated a combination of Colby and Monterey Jack and it was quite tasty.  Growing up, Velveeta was tossed into the potatoes.  Add salt and pepper to taste.

Now for the dough.

Take three cups of flour and add 2 beaten eggs.

Mix well with a fork until the eggs are blended thoroughly in the flour.

Add 1 cup of cold water and work the dough until it holds together and is of kneading consistency.

Take 1/2 of the dough and roll on a lightly floured board to about 1/4" thickness.

Cut the rolled out dough with a 2" circle.  (I don't have a 2" cutter, so I usually grab a cup out of the cupboard - it works fine.)

Scoop about a tablespoon of your potato cheese filling in the center of each dough circle.  Work quickly!  Fold the circle in half and prick the outside edges with a fork, both the front and the back to seal the filling inside the dough pocket.

I dust them with a little bit of flour if sticky and set aside while rolling out the other half of  your dough.

Bring a pot of water to a boil.  Add some vegetable oil as this will keep the pierogies from sticking together and add pierogies (I did about six at a time because my pot was small).  Stir while cooking so they don't stick on the bottom of your pan.

When the pierogies come to the top of the water, boil for an additional 2 minutes.  Transfer with a slotted spoon to a strainer.  

That's it!  I prefer to eat my pierogies sauteed in butter and onions and served with a dollop of sour cream. This recipes makes approximately 3 dozen pierogies and takes about 1 1/2 hours from start to finish.

Just try it once and I bet you'll never buy pierogies again!  :)

Monday, March 19, 2012

Springtime Wallhanging


Spring is really here; sunshine, warm breezes and flowers blooming.  It took a really sweet quilting project to get me to go to my sewing room, and this was it.  So I'm wrapping up this little springtime piece and off to Maryland it goes! 

This is a great way to showcase prints you can't part with even though they are small.  Rectangles are  2 1/4" x 3 1/2" unfinished.  Sashing is cut to 2 1/4" wide. 

This is the design mock-up on EQ5.  Rectangles are six rows by ten rows.


Finished and ready to go.

Saturday, March 17, 2012

March 17th, 2012

Rock iris were the first to break through the leaf mulch.

A blanket of snow was no where to be found and the crocus welcomed this with open petals.

I found a few snowdrops hiding by a mound of lavender.

My little garden Gnome is so confused.  Is he really in New York?  Is it really St. Patty's Day?  Is this just a dream?


If anything is possible....I am off to find my rainbow, leprechaun and pot of sewing notions!  Happy St. Patrick's Day!

Wednesday, March 14, 2012

Subtle non-conformity in action.....

This morning, I went through the photo album to catch a glimpse of the First Communion outfit I made for my youngest.  Martha had commented that she would like to see a picture of my daughter in her outfit.

Let me preface this entire posting by saying 1) my daughter LOVED her Samantha doll as well as the Itty Bitty baby doll she named Eleanor, 2) she was very happy and excited to have an outfit that looked like her doll, 3) this was the early '90's, 4) ......   can you see I'm trying to justify having my sweet, sensitive little girl get in those button up boots and march down the church isle to the beat of a different hymnal?

I'm sure you can pick her out of the line-up.


With her glasses, she looked more like a Molly than a Samantha, but nonetheless, she was (and still is) so cute.  So yes, there was a gasp when she walked in and I faintly remember some pointing (I believe Vatican rules had eased up by this point in time).

Having been brought up Methodist, I had no attachment to the Catholic rituals and hence I was able to break self imposed conformity rules with ease.  While I am a deeply spiritual person, religious structures often find me questioning the system.

So yes Chris, it is wonderful when a child will wear what you create on your sewing machine!  To get them to wear these creations when they are older and are more vocal is even more amazing.

This got me thinking about what I made for her older sister, six years earlier.  Again to the photo boxes.....

This photo before going to church was so painful to see, I had to include an after church picture.  My daughter was an avid gymnast by this time and spent more time in a leotard and rarely wore a dress.
I used a Laura Ashley pattern for a girl's sailor dress.  It was made in a fine cotton batiste with a small cotton trim to dress it up.  It was a perfect blend of her personality and the need to wear a dress.

So for any mother out in cyberspace who is confronted with the satin miniature bride dresses out on the market...... you don't need to conform to the dictates of mass produced clothing on store racks.  Find a dress style that suits your child and make it in white.  Make it comfortable, make it to reflect their personality and if there is any pointing or gasping among the pews, hold your head high and repeat this mantra - thank you, thank you.

Tuesday, March 13, 2012

Another Simple Pattern

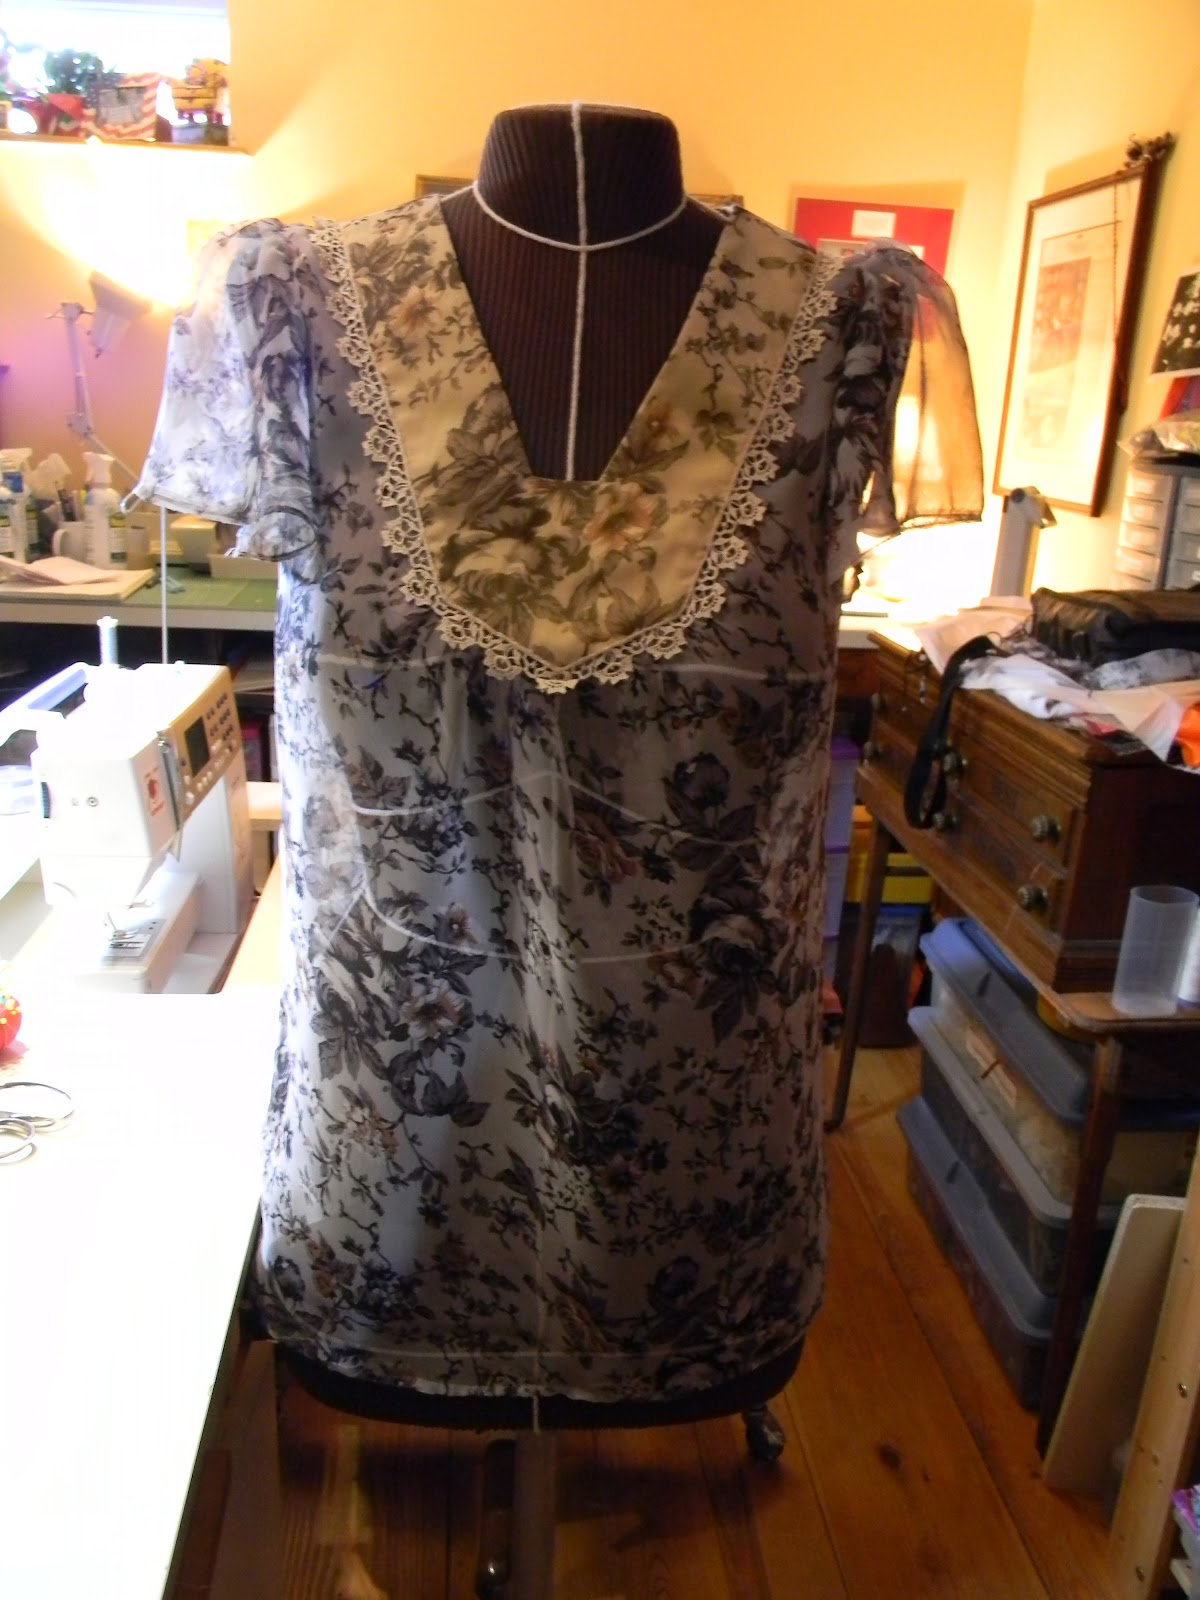
Wait, this time the pattern actually is very simple to construct and has excellent instructions.    It is Simplicity 2891 and I made version C without trim on the sleeves.  Unfortunately, this particular pattern may be out of print now, but I'm sure there is something similar in the pattern books since the bohemian look is a popular style.

This is the chiffon my daughter selected.  It works well as an overlay for the yoke, but it is like taming butterfly wings to sew without support. The fabric description is very lightweight, but it should have read very, very, very lightweight.

 Even though I tried starching the fabric, it  shifted as I was rotary cutting.  My advice:  if you need to work with chiffon, don't rush through your sewing, you need to take your time.  Using a dab of fabric glue stick in difficult to pin areas will help stabilize the sewing area.  Silk thread works wonderful with chiffon.

I had to coat my hands with Paul Mitchell hair gel in order for them not to snag the fabric as I was sewing.  They're not chapped either since our winter has been so mild.

I added some vintage trim around the front of the bodice; so much nicer than a newer trim.  This trim came from an estate sale box that had the most amazing chemical lace and tatted edging.  This blouse would seem a bit dull without this beautiful trim to give it an aged ambiance.


I had to hand roll the hems.  Here are the steps I used:
1) Sew a 1/4" seam line along the fabric edge to be hemmed.
2) Pink the seam allowance to 1/8".
3) With a cool iron, press the hem up along the seam line.
4)  Sew a narrow seam along the fold.
5)  With your fingers, gently roll the hem up as you are sewing a slip stitch.  Step 4 gives your needle a channel to hide and hold the thread.
6)  Gently press the hem with a cool iron.

I am going to put the dress form away and get back to quilting now! (Well, after I clean up my sewing room!)

Thursday, March 1, 2012

When Patterns Claim They Are Easy Part II

I'm finishing up the chiffon blouse and I have two more suggestions for working with sheer fabrics.

Make friends with your iron. 

Pressing after each step will ensure a nice crisp look and help tame your fabric. 

Pressing your garment; the difference between handmade and homemade. 

I have a preference for sewing in interfacing rather than using fusible brands.  I found that if you use just a bit of fabric glue to hold the interfacing to the fabric, it will stabilize the layers making basting easier than using pins. My preference for fabric glue is produced by Sewline.  It is not a permanent glue and will dissolve in the wash.

I trim my interfacing as close as I can get to my basting stitches.  Especially important to remember with sheer fabrics is the interfacing should go on the outside facings; trimmed seams will only be seen from the inside. 

Here is the inside of the collar.  Notice how you can see the trimmed seams.  I also put in stay-stitching to prevent the top of the collar from rolling and to keep the upper edge crisp.  The stay-stitching is on the under collar side.

This is the collar visible from the outside.  The interfacing hides the seam allowances.


Here's the finished blouse.  Black fabric is really tough to photograph, but the good news, it can really hide any imperfections.

Okay, now my rant. 


Here's a portion of the pattern instructions.   They are too vague for a beginner and more illustrations of the steps are needed.  Gone are the days when schools offer sewing in Home Economic classes to give young students a basic sewing knowledge to tackle a pattern labeled "easy".  Also, gone are family members who can offer assistance because they have a knowledge of textiles and sewing techniques. 

The cost of the pattern, fabric, notions and thread is expensive!  I would hate to see a young sewer invest in a project only to become frustrated and hide it in the back of the closet.  Sewing isn't suppose to be a chore, it is the opportunity to create clothing reflecting your personality and setting your look apart from what is available with mass produced goods. 

Maybe a solution would be for these small independent companies to have some sewing tutorials on their websites. Or even notations in their patterns where they could have the steps outlined in more details.  Or better yet, they could label their patterns to actually reflect the skill level needed and write better instructions.

Pattern companies take note, make your patterns to the best of your abilities to ensure a new generation of sewers.